How to Find World-Class Makeup Artists

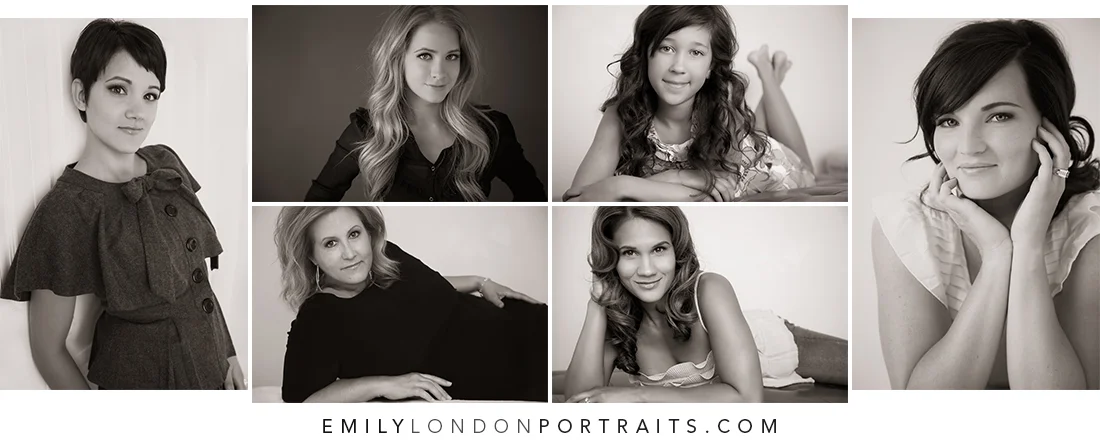
Incredible hair and makeup is one of the most important parts of a photoshoot with Emily London Portraits. While the aesthetic benefits are obvious, one of the hidden perks is the role it plays in your confidence. When you feel beautiful - with gorgeous hair and incredible makeup - you can forget about that part of yourself and reveal the inner sparkle that shines through your eyes as you smile, laugh, and connect with me through my lens.

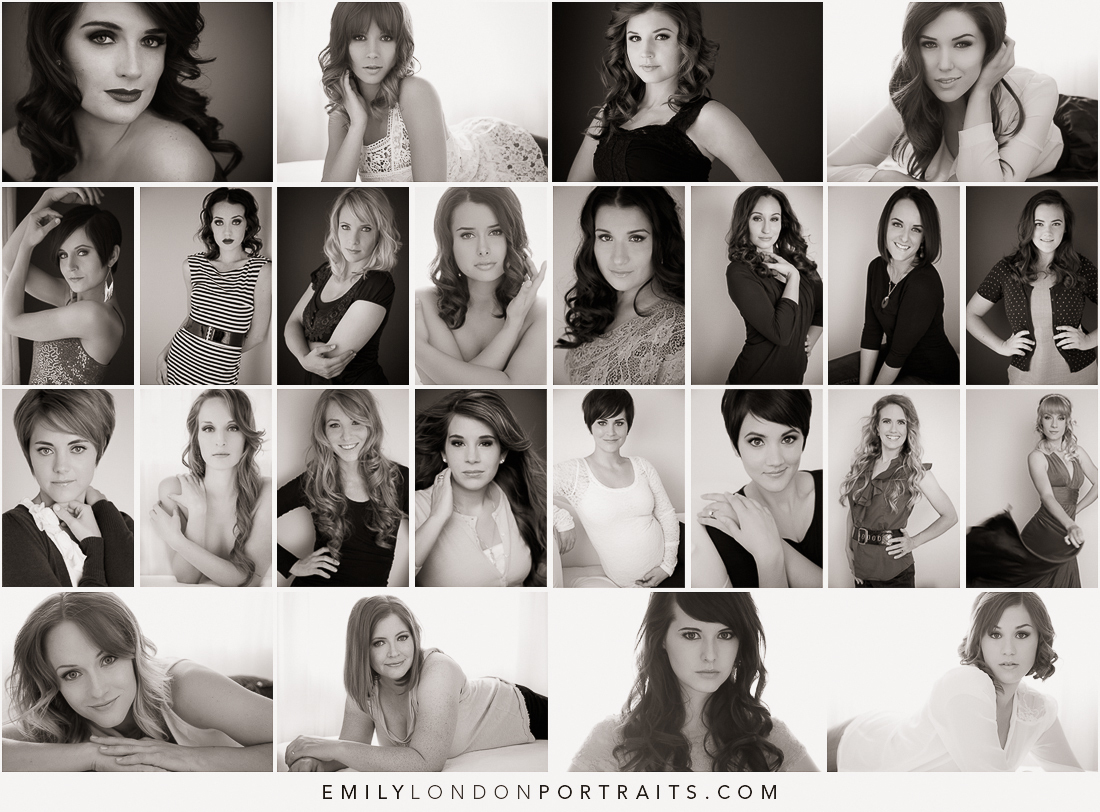
Every shoot in the studio includes professional makeup and hair styling by brilliant artists hand-picked for their exceptional talent and understanding of the particular requirements for natural light photography.

Beautiful makeup and hair styling makes you more confident and comfortable in front of the camera. Emily London Portraits in Utah writes about the importance of working with world class makeup artists, and how she finds them.

Because I've been so fortunate to work with such gifted artists, I'm often asked by fellow photographers: 

  • where to find makeup artists
  • how to know if they're damn good
  • how to communicate your needs to them
  • how much to pay them
  • how to build up a database of reliable, talented makeup artists that you can depend on

If you are a photographer on the hunt for incredible makeup artists, or interested in seeing how I dealt with all these questions in my own makeup artist search efforts, this is the first of a two-post series on Building A Makeup Artist Database. Today I'll be offering ideas about finding incredible makeup artists, tomorrow we'll talk about how much to pay them and how to work with them to produce amazing results.

Beautiful makeup and hair styling makes you more confident and comfortable in front of the camera. Emily London Portraits in Utah writes about the importance of working with world class makeup artists, and how she finds them.

Check Your Local Laws and Requirements

Before you begin your own Hair Stylist/Makeup Artist hunt, research your local laws regarding licencing for hair and makeup. Each state has different requirements. In some states, makeup artists must be licensed to apply makeup in any situation. Some will allow makeup to be applied by a non-licensed artist only if the client is not paying for the service. Some have different rules relating to the film and photography industries. Hair styling laws are generally more strict, but often have various loopholes. For example, if hair will be styled only (no cutting or chemical processing), a non-licensed stylist might be okay for your needs. 

Once you find out what your own state's regulations are, you can then be sure to work within whatever limitations you may have, and don't even interview candidates without the necessary certification.

Makeup Artist, Hairstylist, or Two-in-One?

I always like to work with makeup artists who are also hairstylists. This simplifies scheduling, and keeps drama to a minimum. It isn't the only way to go, though. If you hire separate people for hair and makeup, you have the benefit of extra helping hands during the shoot, and you'll be able to choose from a wider pool of candidates. Finding an excellent hair stylist who is also a makeup artist can be a challenge, but the benefits are worth the effort. Don't expect your search to be over in a day. I'm still on the hunt for talented people to add to my team, and I can't imagine that I'll ever stop.

I try to work with each H/MUA (Hair / Make Up Artist) individually, as opposed to with an agency or through a salon. While there are benefits to working with an agency, they usually come with a much higher price tag.

How Many Makeup Artists Do You Need?

This number will depend on how often you need to hire a makeup artist, how busy your makeup artists are, and how many artists are your 'top choices' vs 'backups.' I do one-two shoots per week, and my own database has two excellent H/MUAs as well as five backups. (If you are hiring separate MUAs and Hairstylists, you'll want a separate database for each.)

My top artists are like magical fairies dusting awesome-sauce all over my studio, and I'm pretty loyal to them, bringing them as much business as they'd like. Once they start getting busy enough to regularly turn my work away, my database will need to increase. I am often testing with new H/MUAs in an effort to polish my database and find artists who are a perfect fit in my studio, but I am very particular, so it's fairly uncommon for me to add a new artist to the regular rotation.

Where to Find Makeup Artists

The first place I started looking for makeup artists was online. I did a Google search for "Utah Makeup Artist", and also checked out an online Makeup Artist Directory. Facebook and Model Mayhem are also good online resources for finding MUAs.

There are several great places to find makeup artists locally. Try visiting a few cosmetic counters at different department stores. Check out any local cosmetology schools, and consider both students and teachers as potential makeup artists for your database. Many hair salons and spas will have a makeup artist or two, possibly working as a hairstylist. Many hairstylists can do makeup, or will know at least one pro makeup artist. 

Beautiful makeup and hair styling makes you more confident and comfortable in front of the camera. Emily London Portraits in Utah writes about the importance of working with world class makeup artists, and how she finds them.

How to Book a Test Shoot

When you meet an MUA in person (possibly at a salon, makeup counter, or hair school) be prepared to show your portfolio. Bring your iPad or even show a gallery on your smart phone. If you're just starting out, at least show examples of the style you're interested in creating. Explain what you do (or want to do) for each shoot, mention how often you plan on hiring an MUA, and see if they have any interest in the opportunity.

If you're making your first contact online, send an email with all the points mentioned above. When I started searching for MUAs, I sent this email to dozens of makeup artists who were within an hour of my studio:

My name is Emily, and I’m a modern glamour photographer based in Provo, specializing in magazine-style portraits. I am looking to establish a relationship with a local MUA who can do hair and makeup on a range of clients, in keeping with my personal aesthetic, while also keeping my clients happy.

I schedule 1-2 double shoots per week, (two clients come in at the same time, usually a mom/daughter, sisters, or friends; for a girls-day-out makeover and photo shoot). The styling begins at 8:30am in my home studio in Provo, and is usually on Tues, Thurs, and Fri, as well as a couple Saturdays a month.

I have a makeup area with good lighting and table space, and can provide all the makeup products needed for the shoot (though you would be welcome to bring your own products as you like). I will also give a beautiful image of each client for your portfolio.

I would like to know the pricing you would charge me for each session, and also to schedule a test-run.

Be as clear as possible about your offer (consistent work, beautiful images for their portfolio, and monetary compensation), your location, your expectations, and any other logistics that may be helpful. End by suggesting that the next step toward working together is booking a test-run. For the test shoot, the MUA can either work on me, a model of my choice, or bring her own model, and I usually let the MUA decide.

Never try out a new MUA on a real client - believe me when I say that every time I have, it turned out to be a mistake. The whole purpose of having an MUA Database is that you should never find yourself without a trusted makeup artist to work with.

Beautiful makeup and hair styling makes you more confident and comfortable in front of the camera. Emily London Portraits in Utah writes about the importance of working with world class makeup artists, and how she finds them.

Test-Shoot Logistics

Time Breakdown

Schedule two hours for a test shoot. You'll need time to explain your specific needs to the makeup artist before she can begin, and be very clear that the hair and makeup process should take no more than an hour (an extra 30 minutes for clients with long and/or thick hair would be appropriate). Plan at least 10 minutes to photograph the final look, and about a half hour (if the test goes well) to discuss the details of working together in the future.

Model Expectations

The model needs to be educated by you or the makeup artist beforehand, so she knows to arrive with clean, moisturized skin, touched-up eyebrows, and clean, dry hair. I usually suggest she wear something comfortable, but bring a beautiful dress or blouse to be photographed in. She should also be informed that I'll be providing the digital file of my favorite image to her and the MUA as well. Be sure to deliver said image within 24 hours.

Location Specs

Provide a well lit space for styling to take place, with counter space, a comfortable chair, (preferably one that can be raised and lowered, or even a tall chair and a low chair) and a mirror. You'll also need to have several outlets nearby for a curling iron and blow dryer. Bonus point for having an extension cord handy. I also have a full makeup kit with my preferred products, but a pro makeup artist will bring her own kit.

Clear Styling Direction

When explaining styling to a new MUA, I'll have several images (on my ipad or computer) to show examples of my various needs. Your own requirements may be different than mine, but should be no less clear and specific when described to your makeup artist.

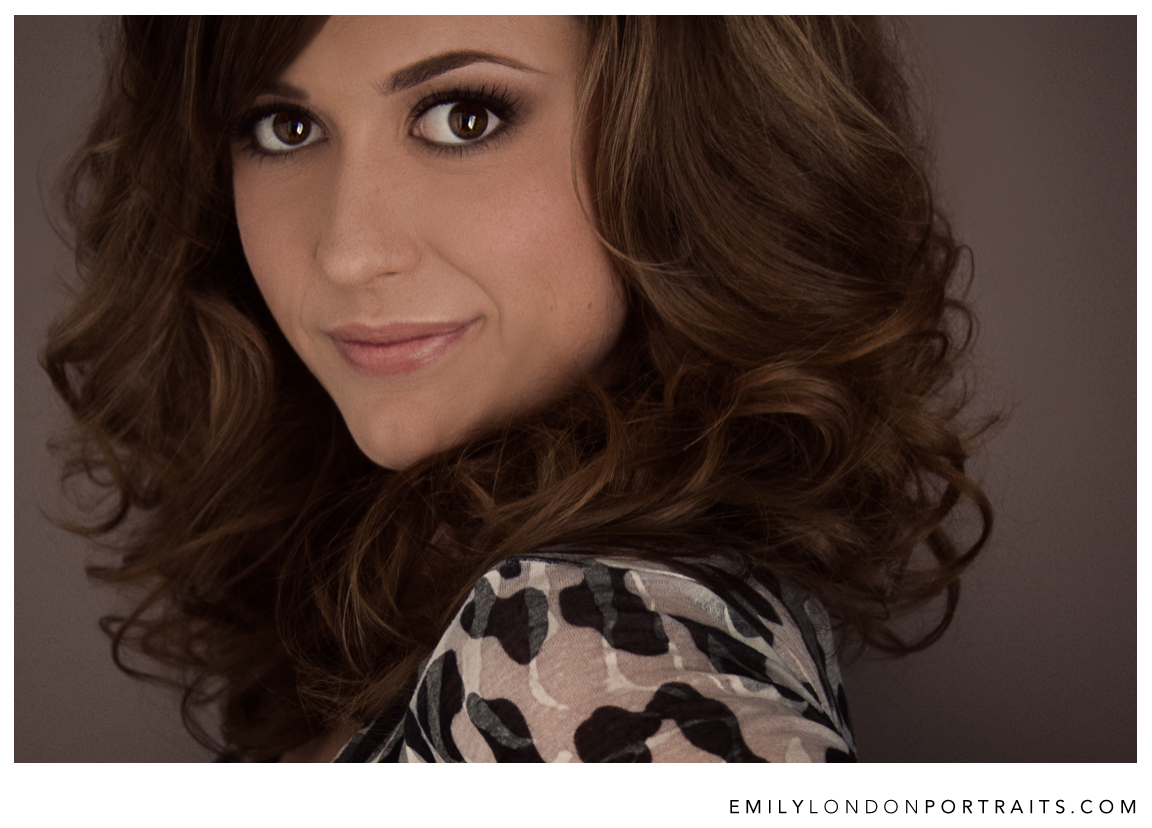
What are my makeup rules? I never allow shimmer or glitter in any products, even eye shadow, highlighter, or lip gloss. Skin should have a matte finish, skipping contouring under the cheekbones. I also am very specific on the way eye shadow should look (matte and very well blended), as well as eye liner (black, and right at the base of the upper lash-line, sometimes called "tight-lined"). Eyebrows should nearly match the model's hair, be filled in, and symmetric. Hair should be curled and very voluminous. 

(Over time, I plan to add several posts and videos that illustrate each of these very specific needs. The posts will include both how to describe them to MUAs, and how to fix them with Photoshop if the MUA does not achieve the correct look. Subscribe below to see these posts as soon as they're released.)

Take Photos

Take a 'Before' photo when the model arrives, and have her sign a model release. When styling is complete, take several shots in your typical studio space. I am a natural light shooter, so I prefer to book test run shoots in the morning, which will allow the best light in my space. I also have a couple of soft-boxes so if an evening shoot is more convenient, I can make that work as well.

When everybody leaves, I'll fully edit the best photo immediately, and post it to my photography Facebook page (as a watermarked PNG), and tag the Model and MUA, or ask them to tag themselves. Then I send it (along with the 'before' shot) via email to both the model and MUA. (usually as a 7x10 JPG at 300dpi).

Beautiful makeup and hair styling makes you more confident and comfortable in front of the camera. Emily London Portraits in Utah writes about the importance of working with world class makeup artists, and how she finds them.

What to Look For During the Test-Run

Reliability

Does the MUA arrive on time? A great MUA should be 15 minutes early. If she is late, do not hire her. She's showing you that she can't be relied on. Believe her. (It's your call if you'd like to even finish the test run.)

Cleanliness

Watch out for important makeup hygiene. Does she wash her hands? Are her makeup brushes clean? Is her kit neat? Does she use disposable mascara and lipgloss wands? Does she ever double-dip them? Are her hair brushes sanitized and hair-free? Feel free to ask her about her sanitation practices. Saying, "What exactly do you do to keep the whole process sanitary?" is a great way to gauge her hygiene knowledge. (Her habits, on the other hand, are something you'll have to keep an eye on during the test.)

Speed

Be sure to point out that speed is important to you, and will be a factor in whether you can hire her for photoshoots. Set a timer in front of her, and leave it where she can see how much time she has taken. If the styling takes more than the hour allotted, she might not be fast enough for this kind of shoot. (Most non-model clients won't have much energy left for the actual photoshoot after a couple of hours in the makeup chair.)

Personality/Energy

Is the MUA a pleasure to be around? Does she put the model at ease? Can she work efficiently while being friendly, or does she pause often to chat? Does she complain or gossip? Can she handle taking your direction well? The last thing you need is any drama in your studio. Find somebody who you enjoy spending time with, since you will potentially see her often.

Fragrance

Does her breath smell? Does she have body odor? Is her perfume over-powering? Bad breath is probably the most likely offender, and also really unpleasant for the model. Good makeup artists are aware of their breath, and usually carry gum or mints to help with this. If she doesn't, and you decide to work with her in the future, you might need to have a mildly uncomfortable conversation about her breath. If she's excellent, it will be worth it. (Please don't just ignore it, and subject client-after-client to an uncomfortable situation.)

Gentle Touch

Does she have a harsh touch, use brushes that are rough or painful, or clamp her free hand on your head? Having your makeup applied by a professional should be soothing, similar to a spa treatment. 

Staying Power

Does the hair style go limp before the test shoot is finished? Does the eye shadow start creasing? Certain touch ups are inevitable - but if the model starts wilting within an hour, your MUA might be using the wrong products, or not asking your model the right questions. 

Aesthetics

While all the other factors mentioned above are important, they really mean nothing if this area is not up to par. Do you like the way the hair and makeup looks when all is said and done? Has she followed your artistic direction? Does it look better than you could do it yourself? Does it look magazine quality? Does your model like it?

Taking a photo (or several) of the model will give you the chance to really study the makeup on your screen, and to see how well it photographs. Look for asymmetry in the features of the client, and if the makeup improved it or exaggerated it. If you decide to work with the MUA in the future, show her the photograph without any editing, as well as the final edit. This way she can see what you changed with photoshop, and work toward decreasing the amount of post-processing needed with each shoot you have together.

If your own makeup knowledge is limited, show the images to a friend who's makeup you admire, and ask for her honest opinion. If you ask specific questions, (Do you like the lipstick color? Is the foundation a good match? Does her skin look even? Is the eye shadow color/placement lovely? Does her eyeliner look great? What about her mascara/fake eyelashes?) you'll get a great lesson on what you could change in photoshop, as well as what your MUA might do differently.

Price Vs. Quality

Is the price she's asking worth the quality of the final results? If she's out of your current budget, but you love her work, you might add her to your database for 'someday' or 'just in case.' If her prices work for you, but her skills are less than stellar, you have to decide if she's good enough to be on your list (possibly as a 'back-up' artist).

Speaking of Price - tomorrow's post will begin by breaking down what you can expect to pay a high-quality makeup artist. I'll also hash-out how to talk pricing with your artists, we'll go over the best practices for working as a well-oiled team, and finally, how to keep great artists once you've found them.
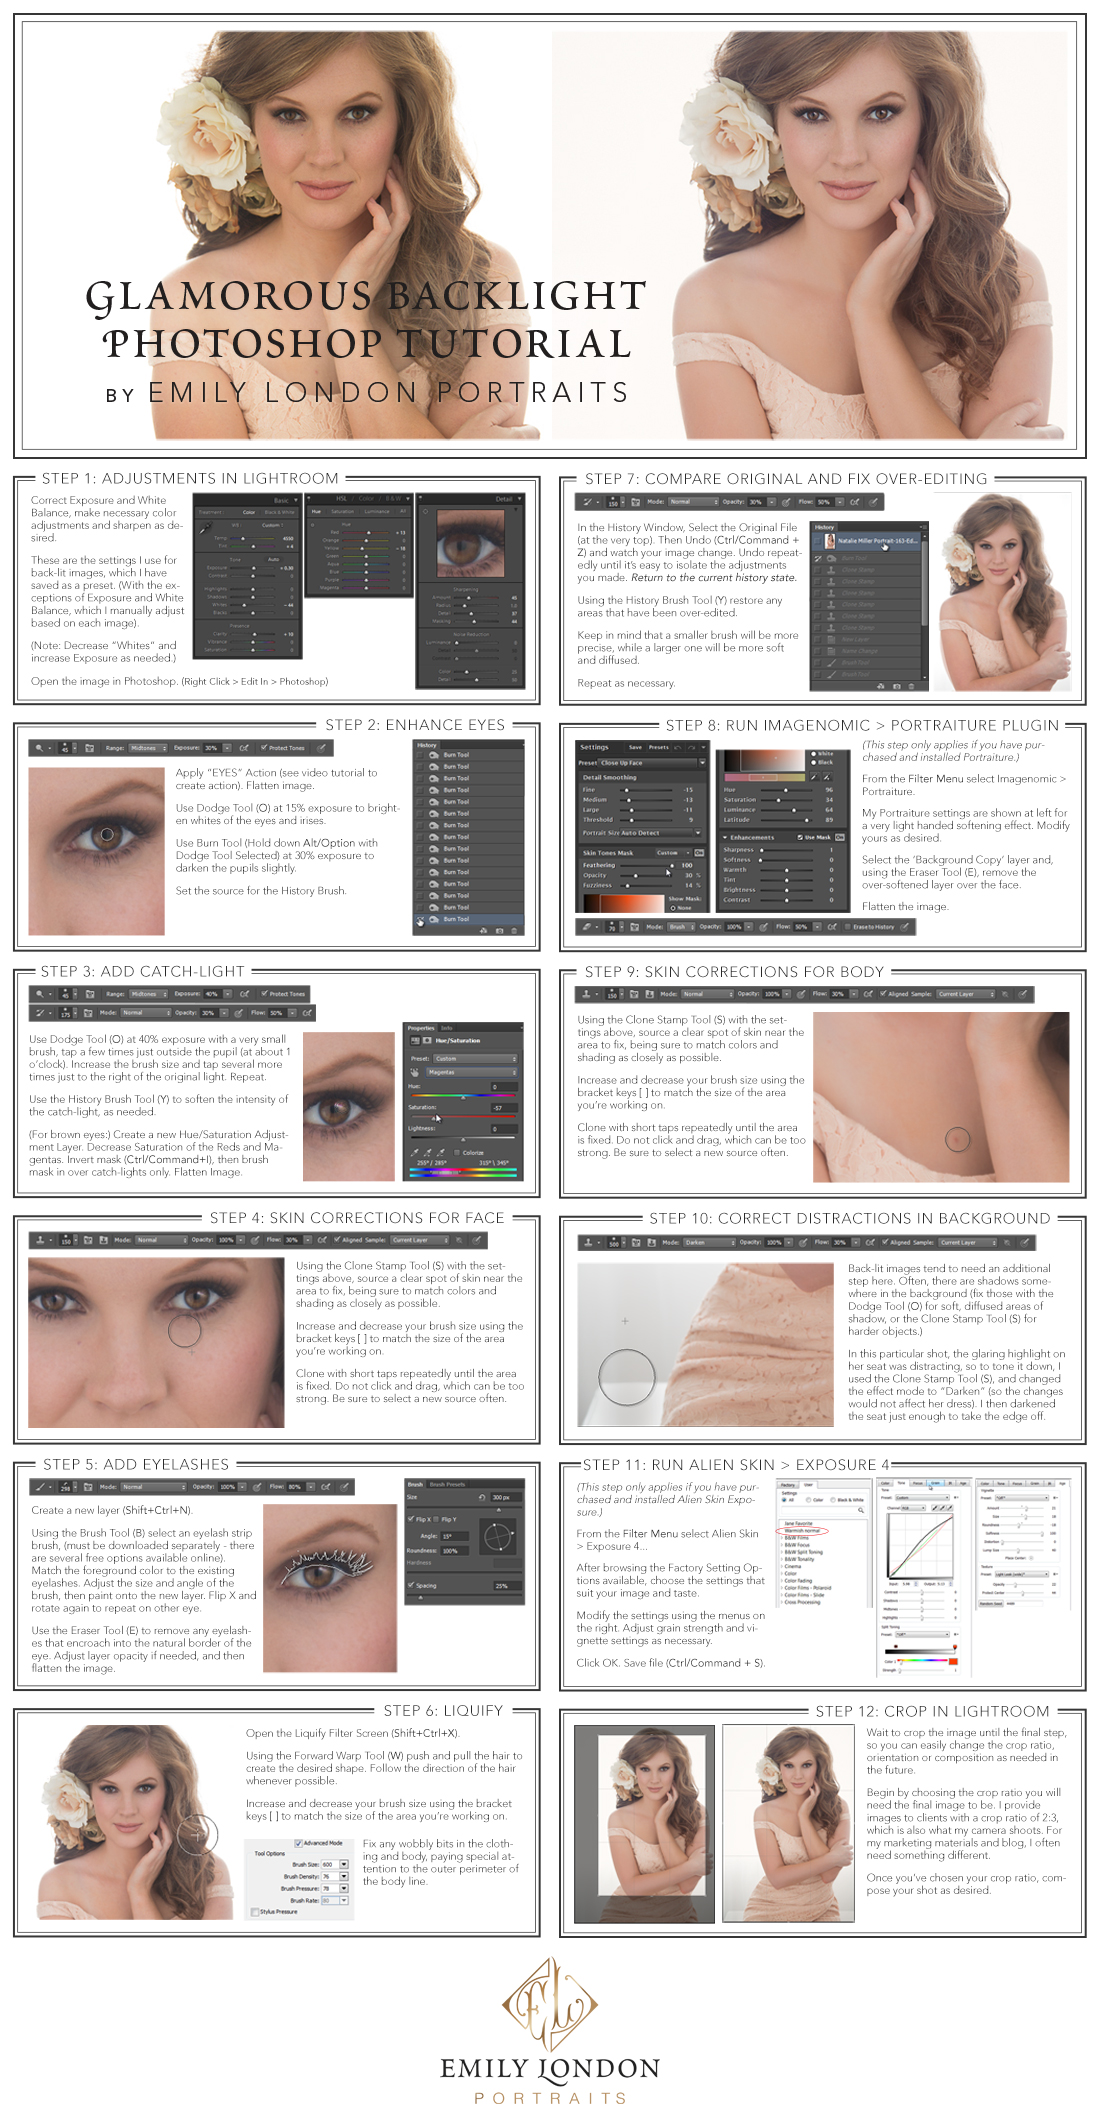
Beautiful makeup and hair styling makes you more confident and comfortable in front of the camera. Emily London Portraits in Utah writes about the importance of working with world class makeup artists, and how she finds them.

Glamorous Backlight Photoshop Tutorial

In this tutorial, you'll see how I edit a back-lit glamour portrait in Photoshop. Learn how to enhance eyes, add in a catch-light and extra eyelashes, correct skin using the clone stamp tool, change the shape of the hair and clothing using liquify, apply skin asmoothing filter (Aperture Portraiture), and use Alien Skin Exposure 4 for a fine-art look. 

You'll also get a look at my workflow, beginning with Lightroom, into Photoshop, and back to Lightroom to keep the editing as streamlined as possible.

Follow along with this full-sized PDF Guide to view detailed setting information.

Emily-London-Portraits-Glamorous-Backlight-Photoshop-Tutorial.jpg

Step 1: Adjustments in Lightroom

Correct Exposure and White Balance, make necessary color adjustments and sharpen as desired.

These are the settings I use for back-lit images, which I have saved as a preset. (With the exceptions of Exposure and White Balance, which I manually adjust based on each image).

(Note: Decrease “Whites” and increase Exposure as needed.)

Open the image in Photoshop. (Right Click > Edit In > Photoshop

Step 2: Enhance Eyes

Apply “EYES” Action (subscribe to access the video tutorial to create action in Photoshop). Flatten image. 

Use Dodge Tool (O) at 15% exposure to brighten whites of the eyes and irises. 

Use Burn Tool (Hold down Alt/Option with Dodge Tool Selected) at 30% exposure to darken the pupils slightly.

Set the source for the History Brush.

Step 3: Add Catchlight

Use Dodge Tool (O) at 40% exposure with a very small brush, tap a few times just outside the pupil (at about 1 o’clock). Increase the brush size and tap several more times just to the right of the original light. Repeat.

Use the History Brush Tool (Y) to soften the intensity of the catch-light, as needed.

(For brown eyes:) Create a new Hue/Saturation Adjustment Layer. Decrease Saturation of the Reds and Magentas. Invert mask (Ctrl/Command+I), then brush mask in over catch-lights only. Flatten Image.

Step 4: Skin Corrections for Face

Using the Clone Stamp Tool (S) with the settings above, source a clear spot of skin near the area to fix, being sure to match colors and shading as closely as possible. 

Increase and decrease your brush size using the bracket keys [ ] to match the size of the area you’re working on.

Clone with short taps repeatedly until the area is fixed. Do not click and drag, which can be too strong. Be sure to select a new source often.

Step 5: Add Eyelashes

Create a new layer (Shift+Ctrl+N).

Using the Brush Tool (B) select an eyelash strip brush, (must be downloaded separately - there are several free options available online. Google “Free Eyelash Brush Set Photoshop”). Match the foreground color to the existing eyelashes. Adjust the size and angle of the brush, then paint onto the new layer. Check "Flip X" and rotate again to repeat on other eye.

Use the Eraser Tool (E) to remove any eyelashes that encroach into the natural border of the eye. Adjust layer opacity if needed, and then flatten the image.

Step 6: Liquify

Open the Liquify Filter Screen (Shift+Ctrl+X).

Using the Forward Warp Tool (W) push and pull the hair to create the desired shape. Follow the direction of the hair whenever possible.

Increase and decrease your brush size using the bracket keys [ ] to match the size of the area you’re working on.

Fix any wobbly bits in the clothing and body, paying special attention to the outer perimeter of the body line. 

Step 7: Compare Original and Fix Over-Editing

In the History Window, Select the Original File (at the very top). Then Undo (Ctrl/Command + Z) and watch your image change. Undo repeatedly until it’s easy to isolate the adjustments you made. Return to the current history state.

Using the History Brush Tool (Y) restore any areas that have been over-edited. 

Keep in mind that a smaller brush will be more precise, while a larger one will be more soft and diffused. 

Repeat as necessary.

Step 8: Run Imagenomic > Portraiture Plugin

(This step only applies if you have purchased and installed Portraiture.)

From the Filter Menu select Imagenomic > Portraiture. 

My Portraiture settings are shown at left for a very light handed softening effect. Modify yours as desired.

Select the ‘Background Copy’ layer and, using the Eraser Tool (E), remove the over-softened layer over the face.

Flatten the image. (Ctrl/Command + E)

Step 9: Skin Corrections For Body

Using the Clone Stamp Tool (S) with the settings above, source a clear spot of skin near the area to fix, being sure to match colors and shading as closely as possible. 

Increase and decrease your brush size using the bracket keys [ ] to match the size of the area you’re working on.

Clone with short taps repeatedly until the area is fixed. Do not click and drag, which can be too strong. Be sure to select a new source often.

Step 10: Correct Distractions in Background

Back-lit images tend to need an additional step here. Often, there are shadows somewhere in the background (fix those with the Dodge Tool (O) for soft, diffused areas of shadow, or the Clone Stamp Tool (S) for harder objects.)

In this particular shot, the glaring highlight on her seat was distracting, so to tone it down, I used the Clone Stamp Tool (S), and changed the effect mode to “Darken” (so the changes would not affect her dress). I then darkened the seat just enough to take the edge off.

Step 11: Run Alien skin > Exposure 4

(This step only applies if you have purchased and installed Alien Skin Exposure.)

From the Filter Menu select Alien Skin > Exposure 4...

After browsing the Factory Setting Options available, choose the settings that suit your image and taste. 

Modify the settings using the menus on the right. Adjust grain strength and vignette settings as necessary.

Click OK. Do not flatten image. Save file (Ctrl/Command + S).

Step 12: Crop in Lightroom

Wait to crop the image until the final step, so you can easily change the crop ratio, orientation or composition as needed.

Begin by choosing the crop ratio you will need the final image to be. I provide images to clients with a crop ratio of 2:3, which is what my camera shoots. For my marketing materials and blog, I usually need something different.

Once you’ve chosen your crop ratio, compose your shot as desired.

Glamour Portfolio Building for Photographers

For several months after my self-inflicted glamour bootcamp, my main focus shifted from shooting, to creating the business. I continued educating myself, watching course after course from creativeLIVE; amassed an enviable makeup collection; expanded my studio to the rest of my basement; upgraded my camera; designed my branding; built my website; and then got stuck on deciding what to offer, what to charge, and how to make a reasonable income. I spent months researching products, creating pricing models, and being indecisive.

Then I met a beautiful couple who photograph weddings. When I showed my ipad portfolio to the wife, her husband leaned over my shoulder and gasped. "These are incredible. How much do you charge for a shoot like that?" I got nervous, and stammered the numbers I'd been trying to pin down for months "oh, I'm not really sure, since I'm trying to figure it out, but I was thinking somewhere between x and z..." As I tried to explain why it's so expensive he interrupts me, saying, 

You’re not very comfortable talking about this, are you?

He then went on to say that the numbers I mentioned were probably too low, and that many women would be happy to pay much more if I'd be creating images like that for them (pointing to my ipad).

This was my aha moment. I still wasn't completely comfortable with raising my prices, however, so I designed an experiment: I would continue my portfolio building efforts, this time aiming for two shoots per week, and I would implement my new pricing structure with a voucher system. This would give me plenty of practice having the conversations about pricing I was so uncomfortable with, extra shooting practice, test the viability of using vouchers, and help me update my portfolio. If I made any income at all, booyah!, but I honestly didn't expect that I would.

I searched Model Mayhem for women within a couple hours of my studio (a wider range) who were willing to work for free and either had a very limited portfolio or were just plain gorgeous. I sent out the new email to over a hundred models, saying:

My name is Emily, and I'm a photographer based in Provo. I specialize in magazine-style portraits. I came across your profile and think you're beautiful and I would be so proud to have images of you in my portfolio. 
Please check out my website (www.emilylondonportraits.com), and if you're interested, give me a call and we can book your shoot and discuss wardrobe and styling. 
Your photoshoot will include hair and makeup for two, so you can bring a friend (or sister/mom/daughter) to be photographed with you (we'll get great solo shots of each of you, as well as a few with both of you together). 
A session with me is normally $249, but I would do your shoot for free, and will also include one fully edited print + digital file of your favorite image from the shoot. You are welcome to purchase any additional images you like, but there is no obligation to do so. 
Because I shoot with natural light, and lighting is best in my studio in the mornings, hair and makeup needs to start at 8:30 am. I am currently booking shoots in May.
I look forward to meeting you! If you have any questions, please feel free to call.

Notice how confidently worded this message is when compared to my first? My goal was to establish credibility, as well as the value of what I was offering. (It was helpful that I had lots of strong work to showcase on my website.) I also emphasized (twice) that we would need to speak over the phone as the next step. During the phone conversation I would explain what they were getting in very clear terms, my prices, and how to prepare. I wrote out a script beforehand, and even carried a copy in my purse. 

Update: What does my script say? I had a very safe script that conveyed the message that this was a free shoot, with a free picture, and that they could always buy more if they wanted to, but that it was no big deal if they didn't. Looking back, it kind of bugs me, so I won't even tell you that version of my script. Instead, I'll share what I say now. Keep in mind that my pricing is now listed right on the website, so I assume they already know and I'm just giving them a refresher.

"My images start at $275 on the wall and go up from there. My big, beautiful folio boxes start at $1200, and go up depending on how many images you order. Most of my clients spend $2000, since we usually have so many beautiful images that most people want them all. :) At the end of the day, though, what you spend is completely up to you. My job is to create portraits of you that are so beautiful, you simply must have them all. :) It’s not to sell you anything you don’t absolutely love – so there’s no obligation to buy, and no hard sell.
Does that make sense? Great.

Now tell me how you want to be photographed; let’s make this your dream photoshoot…”

My 'script' is memorized now, so I don't have to have copies in my purse anymore. For any other questions about what to say during that first phone call, I highly suggest you watch 28 Days with Sue BryceDay 15: Phone Coaching & Scripting.

So, back to the story: I received many responses to this email, but after hearing about my pricing, only a few booked in. Even so, I was able to fill my calender further than a month ahead, and I had a much lower percentage of cancellations/no shows (maybe 5%). This could be because they were getting more prepared for their shoots, because they had to book so far in advance, or because I contacted them within a week of their shoot to say how excited I was to work with them, and to see if they had any questions. 

Building a glamour portfolio using vouchers, Emily London Portraits in Utah tells how she did it and what she learned.

Before each shoot I would watch an educational segment from Sue Bryce, with the goal of learning and implementing a new facet of my craft with each client. While I did get stronger as a shooter and a retoucher, this round of sessions taught me more about pricing, selling, booking, and phone consultations. 

As far as sales went, I was pleasantly surprised to have any at all, with half of my clients purchasing 10 or more images. One might argue that if I had expected to sell (and therefore interacted with the clients in a "what would you like me to create" rather than a "if you decide to buy" style), that I might have had more success. The fact that I was able to sell to even one woman taught me that some women really are willing to pay for the incredible, luxurious experience and high-end products I offer.

Now I just need to go out and find more of them! I am ready to learn how to kick marketing's ass, and that is my next step. The women who want my services haven't heard about me yet, and that's got to change. Once I have some solid experience and advice about marketing, I'm going to post again. In the mean time, I would be thrilled to hear any advice or suggestions.

I don't pretend to have all the answers. I am still learning and growing, still trying to figure this all out. What I already have learned, I'm happy to share. From brand design projects to portfolio building adventures, I hope reading about my own experiences has been helpful so far. If so, stay tuned!

UPDATE: What do I say if a client wants to buy 'just the files? My prices are for the print, image file, and print rights together. The later two are what make the cost of the images so high, not the physical print products. When asked, I say, "What you're buying is the image itself - so these are the prices for "just the files." The fact is, I'm actually including the beautiful prints at a loss to myself, because it's so important to me that you have them."

My Photography Beginning - A Glamour Boot Camp

When I first took up photography in May 2012, I discovered New Zealand Photographer and Educator Sue Bryce. Immediately taken by her modernized glamour photography and amazing teaching style, I bought her Glamour Photography Course and never looked back. 

I connected deeply with this new take on glamour portraits. I could do makeup. I could learn hair. Sue Bryce made everything look so easy, I was sure I could figure it all out eventually. So I asked a few friends and my mom to enjoy a free makeover and photoshoot. Once I had done five modern glamour shoots, I knew I had found my true love. I also realized that it was not at all as easy as it looked, and that I needed some major practice if I was going to become great at this. 

Images from my first five photoshoots, (including one mother & daughter shoot).

Images from my first five photoshoots, (including one mother & daughter shoot).

So I cleared my calendar for two solid months, hiring a full-time nanny and conning my husband into taking over most of my mommy duties temporarily. We stocked the freezer with dozens of meals from Costco, and the fridge with my favorite caffeinated juice drink. I emptied out a spare bedroom in the basement, bought some sheer curtains, polyboard reflectors, a futon, ottoman, and stool. 

While preparing my family, home and studio, I started the process of booking in photoshoots. I posted my new, very small portfolio on Model Mayhem. I then searched the Model Mayhem website for women whom I wanted to photograph, trying to find women over 30 and/or over 135 lbs. Once I had a list of over 60 potential models, I sent each one the following message:

My name is Emily, I'm a local photographer based in Provo. I've recently decided to specialize in contemporary portraiture, and would like to set up some TFCD shoots to build up my portfolio. I came across your profile and think you are very beautiful and I'd love the chance to work with you. 
Check out my current portfolio, and if you like my style, let's schedule your photoshoot!
Because I prefer to shoot in natural light, and lighting is best in my studio in the mornings, hair and makeup needs to start at 8:45am.
Right now my next opening is in mid-July.

I then booked a shoot on almost every weekday for about a month and a half. I also signed up for a makeup course at a cosmetology school in my area. The course was for ten days, and since it was in the evenings (5-10pm) I was able to go to my classes right after my shoots wrapped up.

What followed was a brutal boot-camp style two months that kicked my ass and taught me so much. About 30% of the models rescheduled, cancelled, or didn't show up for their shoots. Since I was pretty overwhelmed, I was usually glad when they didn't. I would use the time to edit or sleep. By the time it was all over, I had done 24 shoots, gotten a certificate to be a makeup artist, and built a respectable portfolio.

Glamour Bootcamp Photoshoots - 24 shoots in under two months.

Glamour Bootcamp Photoshoots - 24 shoots in under two months.

I also learned a few key things that anybody attempting their own Glamour Bootcamp should know:

If you plan to do hair and makeup for your shoots, check your local laws about licensing requirements. In my state, there are no requirements, and therefore, taking a makeup course was not necessary. I had hoped to learn a lot, but honestly, it was a waste of $2400. Each of the ten days of class contained only one hour of instruction (once you factor in lunch and practicing on each other). After I had finished taking the Makeup Artistry Course, Sue Bryce launched her Hair and Makeup Course, where, for about 5% of the cost, I was able to learn about 200% more. Youtube is also chuck full of free education for aspiring makeup artists. 

I also learned that 20-30 images was far too many to promise for free. Most models would be game to work for 10-15 images, and with this kind of volume, editing 30 images per shoot was wretched. Looking back, if I had to do this over again, I would promise to show 20-30 unedited photos, and to provide 10 of their choice, fully-edited, for free. Then if they wanted to buy any extras, I would be happy to include (and edit) them for $10 each. (No unedited photos would be provided.) This way, I would still be learning how to shoot for 20-30 great shots, get some practice with showing and selling, hear some legitimate feedback about which images actually sell, all while still providing a fair trade. 

My final lesson was that daily photoshoots are exhausting. I'd suggest to space your shoots to every other day, instead of back-to-back. That way, you can fully edit your last shoot before the next one takes place. The main benefit to this (besides staying caught up) is that you'll be able to critique your shoot, make note of problems and mistakes you made, research what to do differently to fix them next time, and make an actionable plan/goal list for your next shoot. (Example: "Damn. Her hand is a claw in every single shot when she was in that position. I can't believe I didn't see it in person. Note to self: Look at hands tomorrow.")

To answer the question of why I did all these shoots for free: I considered this boot camp to be my photography education. I was brand new as a photographer, and so had to learn everything - lighting, posing, composition, makeup, hair styling, which clothes suit which poses, which poses suit which people, and how to cull and edit photos. I did not ask for any compensation from the models, because I had absolutely no photography experience and felt uncomfortable with representing myself as a professional. I was still a student, I made a lot of mistakes, and they were helping me out.

For seasoned photographers who are transitioning into the glamour genre, and have less to learn about lighting and composition, and more to learn about posing and pricing; promising to do 30 TFCD photoshoots for free is over-kill. You're already a professional, and your work is already sell-able. A more reasonable way to learn the new components of glamour specifically, would be to set your prices and implement a voucher system.

I'll share my own experience with a voucher system in my next post. This was for my second round of portfolio building, when I was able to produce my strongest work, and create the images you see on the website today. Included will be how I became comfortable with my pricing, how I presented myself to the models and clients, and the formula I used to consistently improve with each shoot.

The Beautiful Products and How They're Delivered

When your photoshoot is over, we will have created some of the most beautiful images you have ever seen of yourself. You'll be able to choose your favorites, and decide how you'd like to display them. You can decorate your home with a beautiful framed portrait, or even an entire wall gallery. Or, for a special (and possibly private) option, the handmade Folio Box is a beautiful keepsake designed to protect and showcase the images inside. 

In addition to the products we create, any image you buy will be saved on a USB drive as a high-resolution file, which will be print quality up to the size you purchased. 

Samples of all these beautiful products will be in my studio on the day of your photoshoot, so you can see them in person. If you would like to see them before booking a shoot, a free consultation in the studio will be the perfect way to answer any questions you may have. 

The beautiful products from a modern glamour photoshoot with Emily London Portraits in Salt Lake City.

For my photographer friends, the rest of this post is the final part of a series on branding. Beginning with logo and brand design, then showcasing the welcome packet I send to each client, and now ending with the products and packaging I deliver to my clients. 

The USB Drives

In the image above you'll see the customized USB drives and the lux packaging for them. In each drive I create for my clients, I include a folder containing the High-Res files, named something like, "Print Quality Photos (7x10)". A second folder named "Web Size Photos (1000px)" has watermarked files saved to 1000px on the long edge. I make these PNG format, which looks better in Facebook than JPG, and name them "Emily London Portraits Utah Photoshoot 2013 - 1". I also include a Print Release file which gives the client permission to print their photos, their Before & After, a shortcut linking to my website and one linking to my facebook page, a copy of my price list, and a referral card in JPG format for sharing.

The Folio Box

The Folio Box is handmade by Finao and customized with my logo. They offer two depths, the deeper on holds 26 matted prints, and the shallow can fit 18. I buy both, and provide the shallow one when my client orders 6 or 10 images, and the deep one for my 20 image set. Either way my cost is the same.

I also use Finao's Slide-In Mats. While they offer several size options, I prefer the 7x10" matted to 11x14. Why 7x10 and not 8x10? A) It looks better in the 11x14 mat, B) It's the crop ratio that my camera uses, and C) It makes people look slimmer/longer. I do have a sample image cropped both ways, so I can show the difference to my client if they ask. Usually they don't.

The prints inside the folio box are made at ProDPI. I use them because they're quick, they're reasonably priced, and they include a free candy with every order. My paper preference is the Fugi Deep Matte, although I show several paper options to each client and let her decide. 

The Framed Gallery and Other Framed Prints

I designed the 9-up frame to hold nine 5x7.5" photos, and to be the exact same dimensions as a 16x24 framed print. Simply Color Lab makes them for me, as well as my individually framed prints. I chose Simply Color Lab because they allowed me to design my own 9up, and it was important to me to find a printer/framer who would be able to create all the framed products I wanted to offer. This way, if my client orders a 9-up and a 16x24, the frame styles will match. They also offer large print sizes with the 2:3 ratio that is sometimes tricky to source, but is definitely my preference.

Once I decided to start ordering through Simply Color Lab, I bought their frame corner set so my clients can see all the frame style options in person.

The Packaging and Final Presentation

When I deliver an order to my client, I want the presentation of their portraits to be perfect. I wrap the folio box in tissue paper, and top it off with a custom wax seal with my logo (using black hot-glue-gun wax). I make my wax seals ahead of time and adhere them to my packaging with super strength glue dots from Hobby Lobby.

I then bag the folio box, and USB case in a customized album bag. I purchased several sizes, so whichever size print my client orders, I'll have the right size bag. For a beautiful finishing touch, I use tulle (from Hobby Lobby) instead of tissue paper. 

The beautiful packaging from Emily London Portraits in Salt Lake City.

Preparing for Your Dream Photoshoot | The Welcome Packet

When you book a modern glamour photoshoot with Emily London Portraits, you'll receive a beautiful welcome packet. If you take advantage of the in-person consultation, I'll send it home with you. If your consultation happens over the phone, you'll get treated to finding a lovely package in the mail. Either way, I'll discuss all the included information during your consultation so we can make your dream photoshoot a reality.

A beautiful welcome packet is sent to every client after she books a modern glamour photoshoot with Emily London Portraits in Utah.  

For anybody who's interested in offering beautiful Photoshoot Preparation Guides for your own clients, stay tuned! I'm in the process of designing several Glamour Photoshoot Guides, and I expect the first one will be ready by the end of this week! 

Photography Branding Design | Step-by-Step

Designing a new logo and branding can be a really exciting and fun process. The main down side is that it's a hell of a lot of work. Whether you plan to hire a professional designer, or to bust out your own mad-design-skills, you'll need to decide the overall mood and values of your brand before your project can take flight. 

When I began my own branding journey, I watched branding courses, studied books and blogs, and spent weeks worrying and revising. Now that it's all over, I'm proud of the branding I created for my own business, and I hope you'll be able to benefit from some of the tricks I picked up along the way.

One of the best parts of starting a new business is designing the branding. This is the cheat sheet I made to keep everything together, and a step-by-step guide to perfecting your own branding | By Emily London Portraits in Salt Lake City.

Step 1: Make an Inspiration Board / Develop a Pinterest Addiction

When I began developing the branding and logo for Emily London Portraits, I turned to Pinterest for inspiration. I created a new pin board called "Branding Inspiration" and started filling it with logos and brand boards that I loved. (You can find lots in Pinterest, by searching for "Logo" "Branding" "Brand Board" "Packaging" etc.) When pinning to your own branding pin board, make sure to caption each pin with a note about what specifically you like in the photo, for example: "Colors" or "Font" - it doesn't have to be complex. This will really come in handy if you are working with a designer or business partner and need to communicate your vision. 

Step 2: Decide Who Your Brand Is (or Will Be)

After amassing a huge Branding Pin Board, I looked at the overall direction of what I loved. Some designs really conflicted (I love the bright colors in this one, but the monochromatic color scheme of this other one), so I had to start culling my beautiful new collection. 

To really hone the direction I wanted to take with my brand, I needed to decide what message I wanted to convey about Emily London Portraits. I brainstormed all the qualities that my photography style had (or that I wanted it to have): glamorous, beautiful, feminine, sumptuous, sensual, dreamy, ethereal, confident, etc. (Keep in mind these were very personal to me - you might relate more to words like whimsical, retro, bold, strong, masculine - or something completely different.) If you find this step challenging, check out the pins in your brand board and think of how you would describe each image you chose.

Once I had my long list of attributes that describe my photography style, or what I knew I eventually wanted my photography style to be, I thought long and hard about my ideal client. Of the qualities my photography had, which ones would attract her the most? With her in mind, I chose the top three words to describe my brand.

Luxurious - Timeless - Elegant 

Step 3: Refine Your Pin Board

I then returned to Pinterest and eliminated all the pins that didn't belong. For example, I loved a lot of retro designs, which is a very trendy style right now. Since being Timeless is so key to my brand, I removed any designs that said "trendy" to me. I also removed anything that didn't portray the luxury and elegance I wanted for my brand. After culling out quite a few images, I searched for new inspiration to pin, this time focusing on adding pins that fit my new criteria.

Step 4:  Choose Your Color Palette

This might be my favorite part. Either search for "color palette" in Pinterest, or visit a color palette website like Design Seeds for some excellent inspiration. Keep in mind that you'll be using your colors on your website, marketing materials, and packaging, so you'll want lots of versatility. I suggest to include a dark color (for text), a light color, and several mid-tone options that are complimentary but not monochromatic. I started with Black, White and Gold for my foundation colors, and added a couple colors that I knew would show up in my work often, and that would be versatile on my website. 

Once you have your color palette worked out, return to Pinterest and remove the pins you added solely for their colors, but don't fit your final color scheme.   

Step 5: Design Your Logo

A great logo is essential, especially when you're a photographer. Your logo is probably going to be the watermark you use on every single image you put out into the world, and could enhance each image, or destroy it. A crappy logo kills your credibility, ("Wow, that logo is so bad, the photographer must have terrible taste.") or, at best, is forgettable - getting lost in the sea of pictures that is the internet. Since your logo stays with you for years, shouldn't it be a high priority to make it amaze-sauce?

Before I became a photographer, I worked as a designer for the vinyl decal company I own with my husband. If you aren't a designer, I strongly (intensely, passionately, vehemently) suggest you hire one to design your logo. 

There's a range of pro logo design options available. From customizing a stock logo on Etsy, to hosting a design competition on 99 Designs, to hiring a design master like Angela Scheffer at Saffron Avenue. Each option comes with it's own pros and cons, and the cost ranges significantly, from $10 to $1000 for a logo only, and up to $5000 for a branding package which includes your logo, branding, website and blog design.

Whichever option you choose, your new Pinterest board will be a flippin' amazing way to concisely illustrate the direction you'd like your brand to take. Share your three main brand qualities and color palette with your designer, and s/he'll be able to create a very personalized design for you.

If you do opt for the DIY route, please avoid the fonts Papyrus, Vivaldi, Scriptina, and Comic Sans. Trust me on this one. I can't explain why not without sounding like a super snob. So I won't. But just... trust me.  If you already have a logo using one of these fonts, stop reading now, begin working on Step 1, and do not pass go. You're welcome.

Step 6: Assemble the Whole Package

Finally, you'll need to compile your final design elements into one place. I created the brand board above, and have it saved as a .psd file. Whenever I need one of the components, I can open the file to drag and drop the desired element into my current project. I also have individual files saved for my logo, watermark and symbol, in .psd, .jpg and .png formats. They are also saved as brushes in my Photoshop Brush Library, and as Lightroom Watermark Presets.

After deciding on and compiling all the design elements for my brand, the website design process was fairly straightforward. The site was created with a template by Squarespace, which was easy to customize to fit my new branding.

I also have designed marketing materials, product offerings, and packaging which are all complementary to each other and to the brand board above. Since the information for those is pretty extensive, I'll be dividing the information into separate blog posts. In the mean-time, get started on your own Pinterest Brand Board.